In this lesson we continue building a practical mobile testing workflow. The focus is not just “how to click around in Android Studio”, but how to control the emulator, route traffic through a proxy, modify requests, simulate broken network conditions, and poke the app from the outside using ADB, Objection, and static APK tools.
The key idea is simple: a tester should be able to control the test environment. If the emulator, proxy, or APK behavior is a black box, debugging becomes guesswork.
What we will cover:
- Launching and configuring the Android Emulator from the terminal.
- Reading mobile traffic in Charles Proxy.
- Using breakpoints to pause and edit traffic.
- Using throttling, rewrite rules, filters, and block lists.
- Dynamically launching Android components with ADB and Objection.
- Statically modifying an APK with tools such as APKTool and JADX.
Tools used in this lesson:
You may need the following tools:
- Android Studio / Android Emulator: https://developer.android.com/studio
- Charles Proxy: https://www.charlesproxy.com/download/
- Frida: https://frida.re/
- Objection: https://github.com/sensepost/objection
- APKTool: https://apktool.org/
- JADX: https://github.com/skylot/jadx
- Uber APK Signer: https://github.com/patrickfav/uber-apk-signer
Use them only in your own lab environment, on your own apps, or on apps where you have explicit permission to test.
1. Why configure the emulator manually?
Android Studio is convenient, but it hides many emulator options. For normal development that is fine. For testing, debugging, and traffic interception, it is better to understand how the emulator starts and which flags control its behavior.
Manual launch is useful when:
- Android Studio starts the emulator with bad graphics/audio settings.
- You want a clean boot without the previous snapshot.
- You need a predictable state for class demos or automated testing.
- You want to start the emulator with proxy settings already applied.
- You want to run the emulator outside Android Studio.
List available virtual devices
emulator -list-avdsThis prints the AVD names available on your machine. These are the same emulators that Android Studio can see.
Start an emulator by name
emulator -avd Pixel_9A more realistic launch command for testing may look like this:
emulator -avd Pixel_9 \
  -no-snapshot \
  -no-boot-anim \
  -gpu swiftshader_indirect \
  -no-audio
Common emulator flags
| Flag | Meaning | When to use it |
|---|---|---|
-no-snapshot | Start without restoring the previous saved emulator state. | When the emulator behaves strangely or you need a clean boot. |
-no-boot-anim | Skip the boot animation. | To make startup faster. |
-wipe-data | Reset the emulator data completely. | When you need a fully clean device. |
-gpu swiftshader_indirect | Use software rendering. | When graphics acceleration causes issues. |
-no-audio | Disable audio. | For cleaner testing or headless/demo environments. |
-http-proxy http://127.0.0.1:8080 | Start the emulator with an HTTP proxy. | When you want traffic to go through Charles from launch. |
-gpu off | Disable 3D acceleration completely. | When rendering is broken or unstable. |
-no-window | Start in headless mode. | For CI or background emulator runs. |
Example with proxy:
emulator -avd Pixel_9 \
  -no-snapshot \
  -no-boot-anim \
  -http-proxy http://127.0.0.1:8888
Adjust the port to match your Charles proxy settings.
2. Traffic analysis in Charles Proxy
Charles Proxy allows you to inspect traffic from the emulator. For mobile testing this is useful because you can verify which requests the app sends, what headers are present, what payload is sent, and how the app reacts to specific server responses.
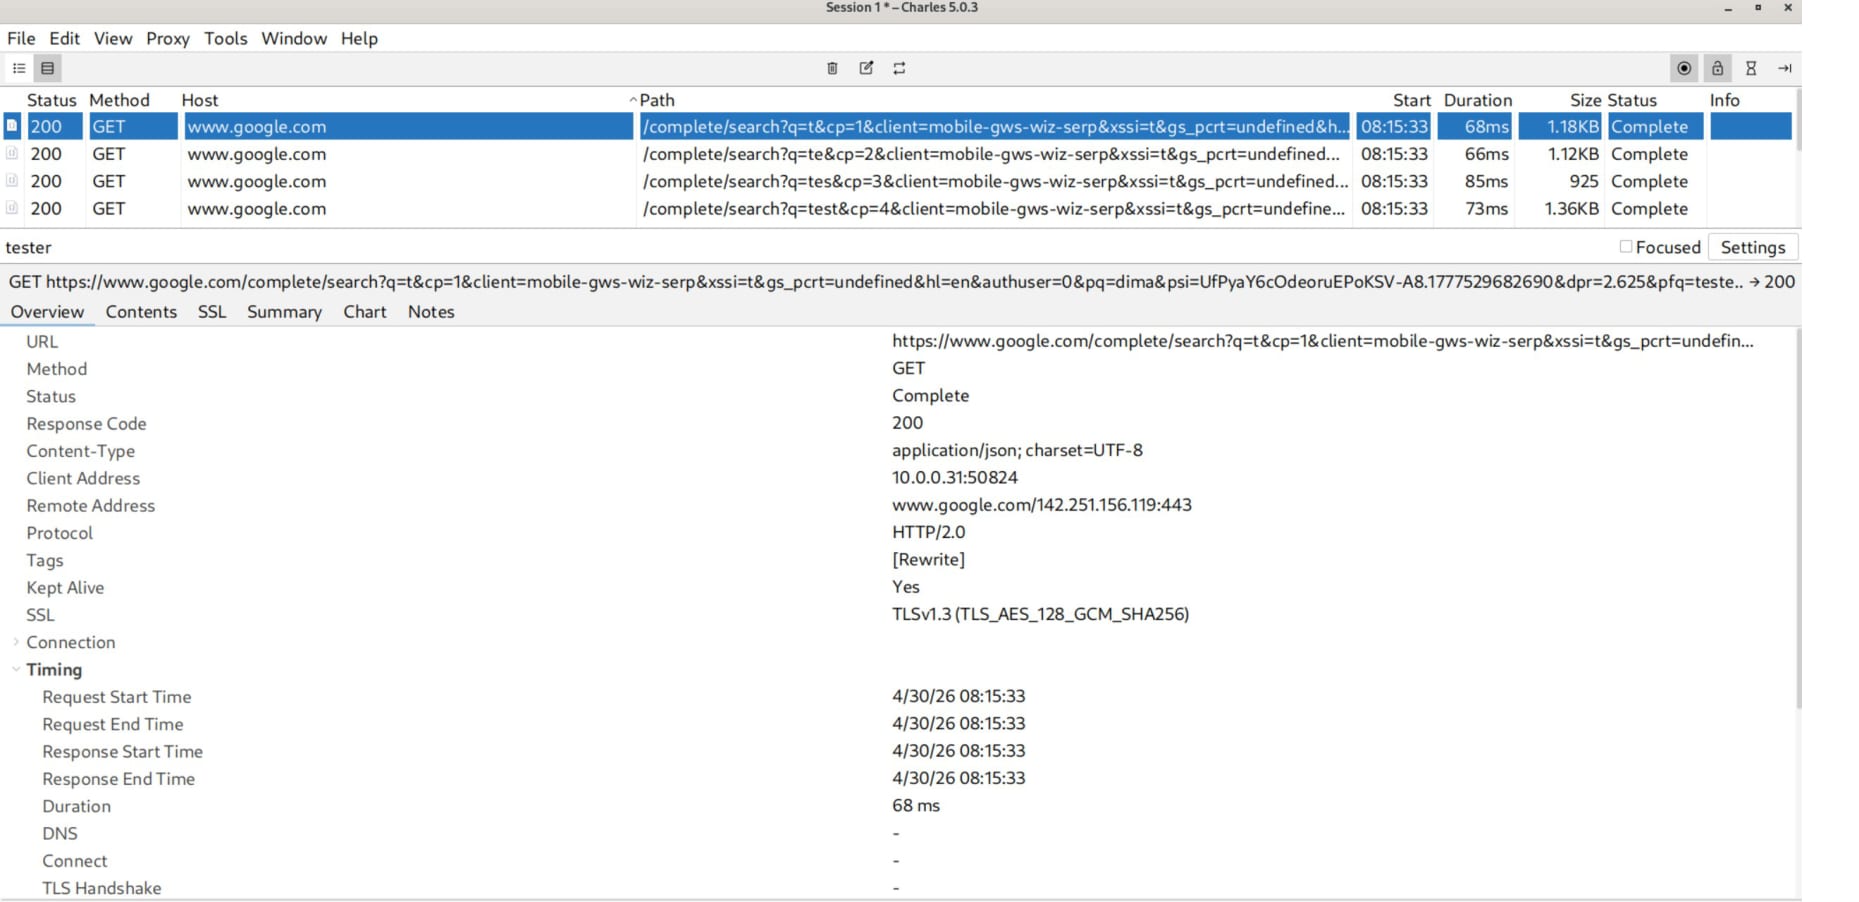
Sequence View
Sequence View shows requests in the order they happen. This is usually the easiest mode when you want to understand a flow step by step.
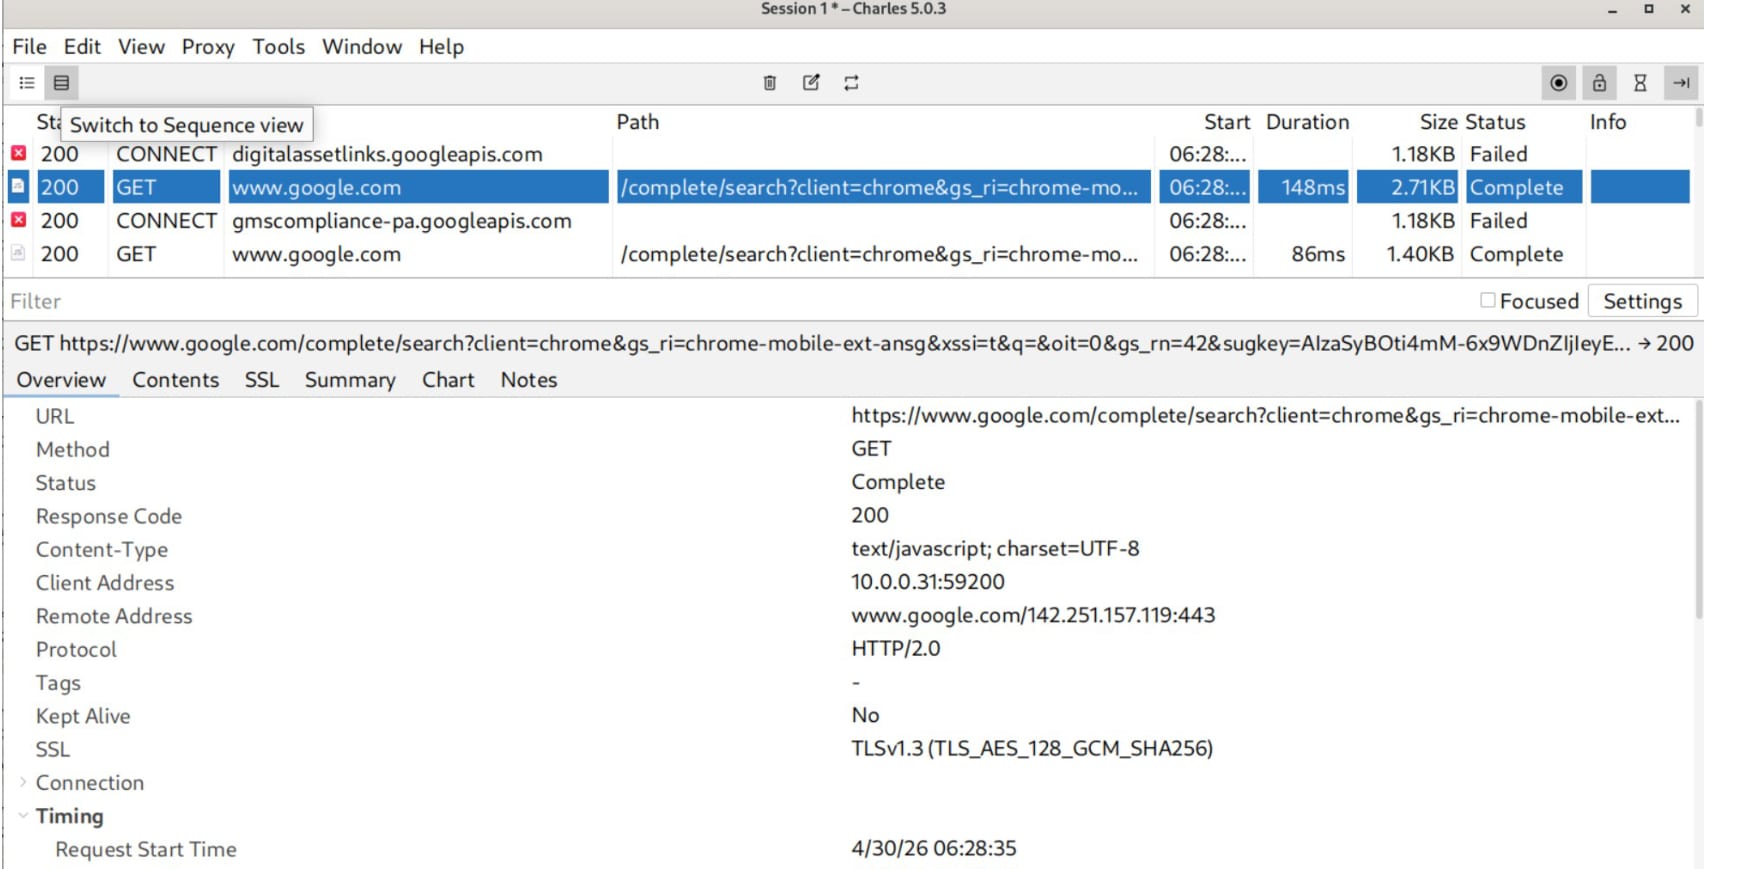
In this view, pay attention to:
- host
- method
- path
- status code
- request duration
- size
- SSL/TLS information
- request and response contents
A simple QA question here is: “Did the app send the request I expected, at the moment I expected, with the data I expected?“
3. Breakpoints: pausing traffic before it reaches the server or client
Charles breakpoints let you stop a request or response before it continues. This is extremely useful for testing edge cases.
You can pause traffic and then change:
- query parameters
- body values
- headers
- response codes
- response bodies
Example breakpoint rule
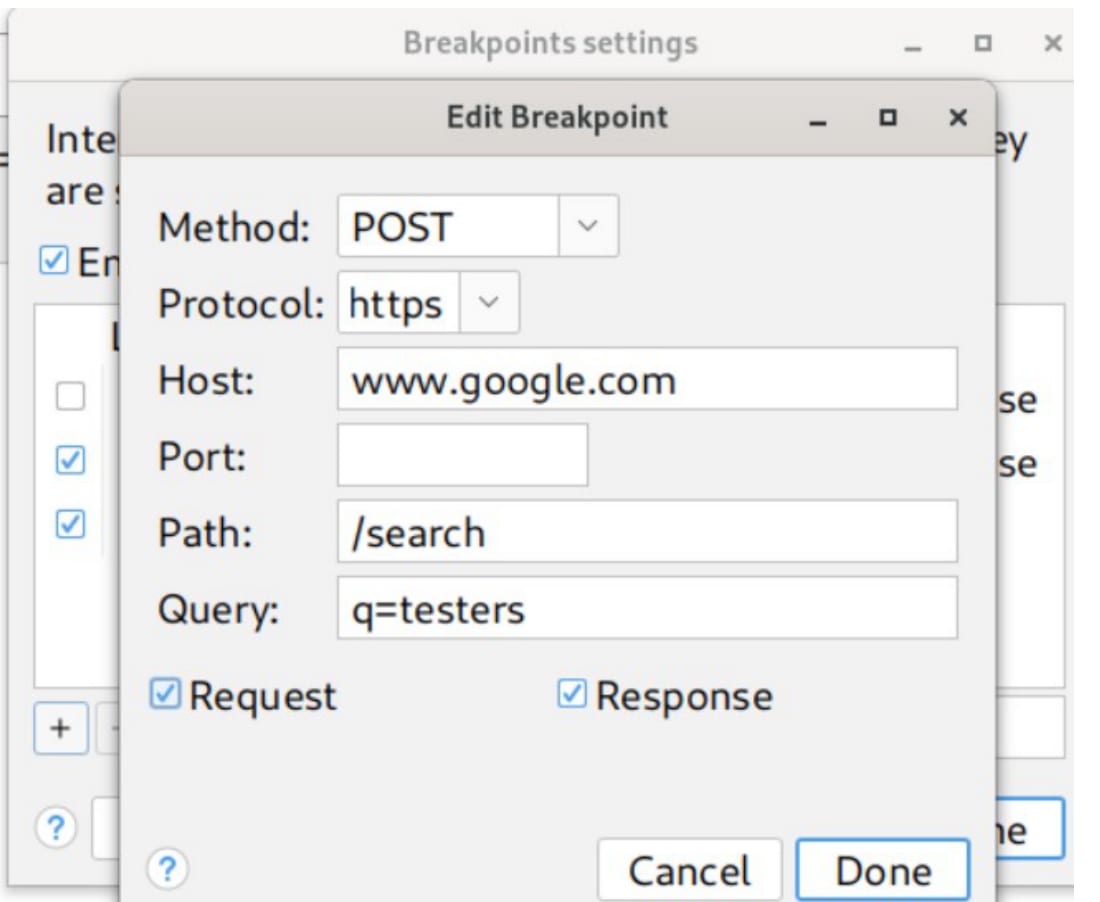
The breakpoint can be limited by method, protocol, host, path, and query. This is important because you usually do not want to stop every request. You want to stop only the request relevant to your test.
What happens when the breakpoint is triggered
When the request is paused, the client waits. If you do not continue the request or if the protocol flow is broken, the app or browser may show an error.
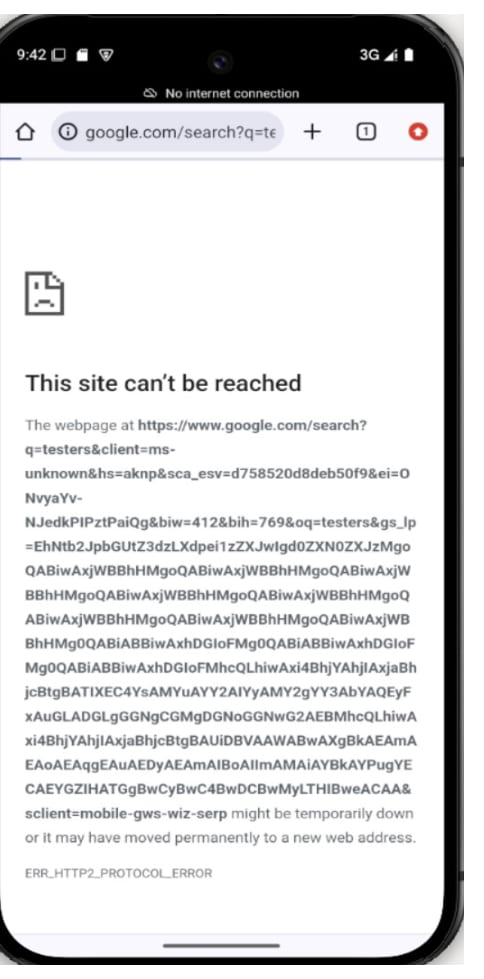
This is useful by itself. You can test how the app handles network delays, broken flows, incomplete responses, or unexpected backend behavior.
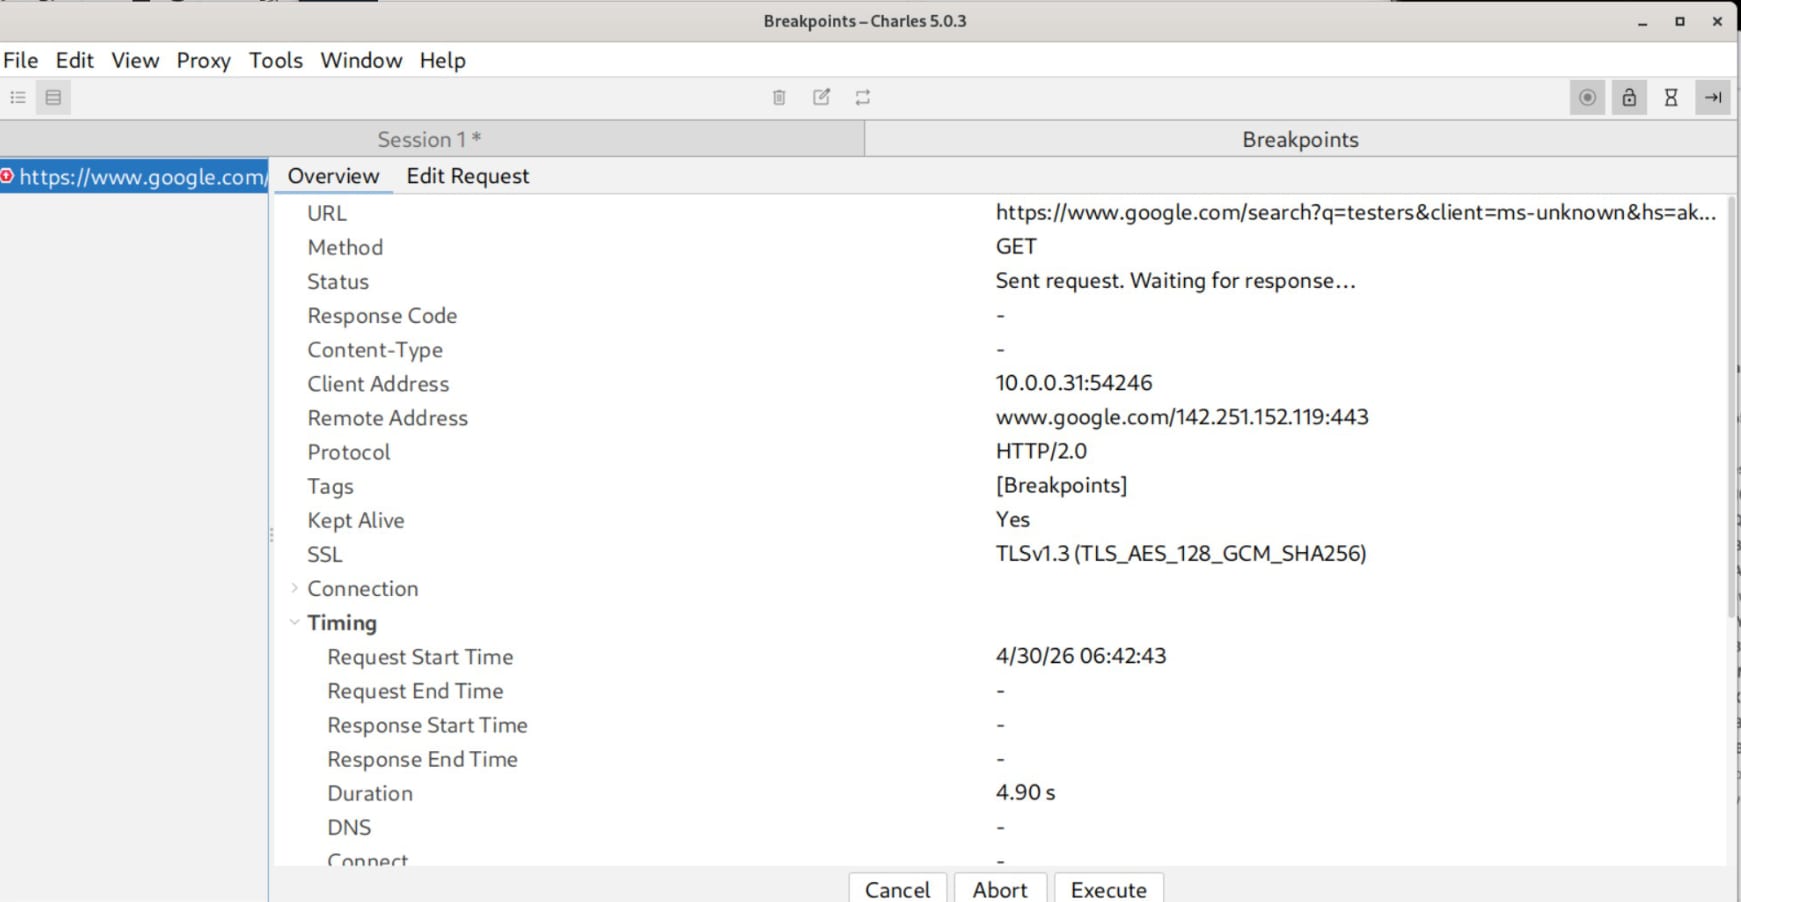
4. Editing a request
After the breakpoint is triggered, open the request editing view. In this example, the query parameter is changed before the request continues.
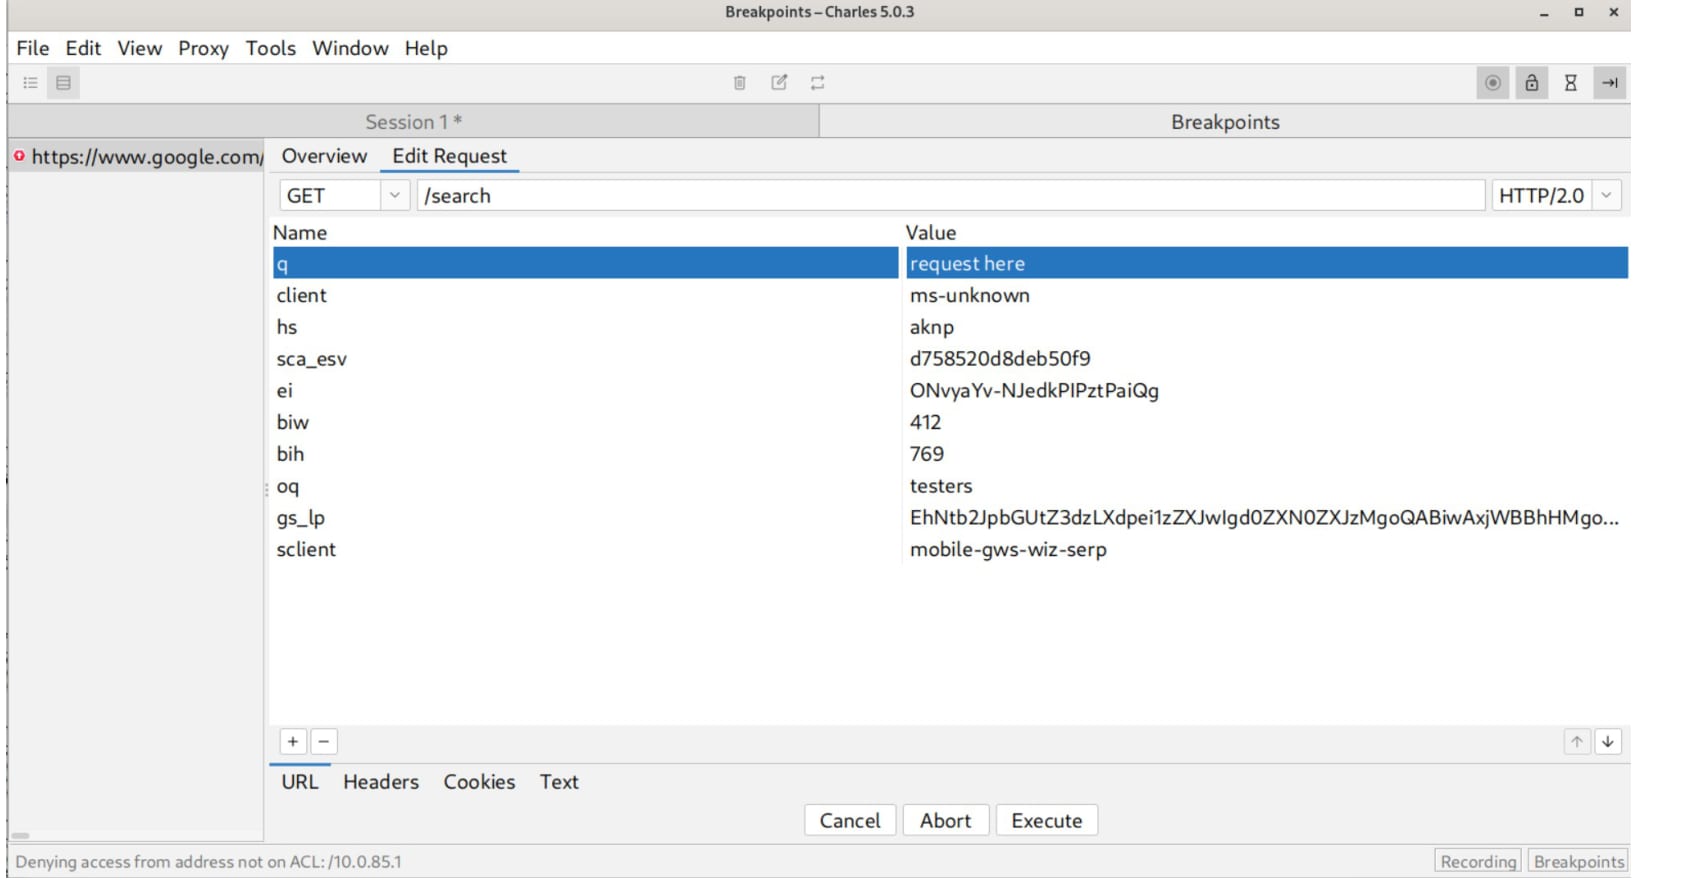
A typical test scenario:
- The app sends a request with parameter
q=testers. - Charles pauses the request.
- You change the value to something else, for example
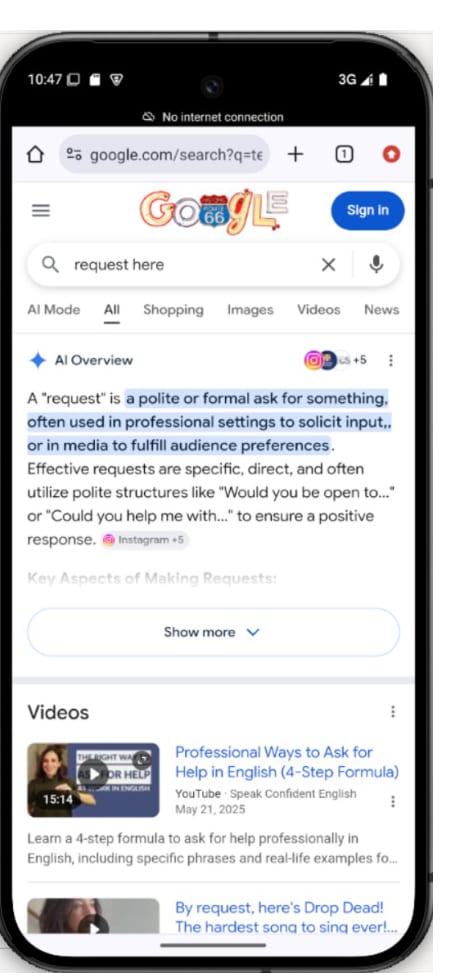
q=request here. - You execute the modified request.
- You observe how the client behaves.
After the request is changed, the client receives a result for the modified value, not the original one.
This technique is useful for checking whether the app relies too much on client-side restrictions. If a value can be changed in transit and the backend accepts it, that may be a serious backend validation issue.
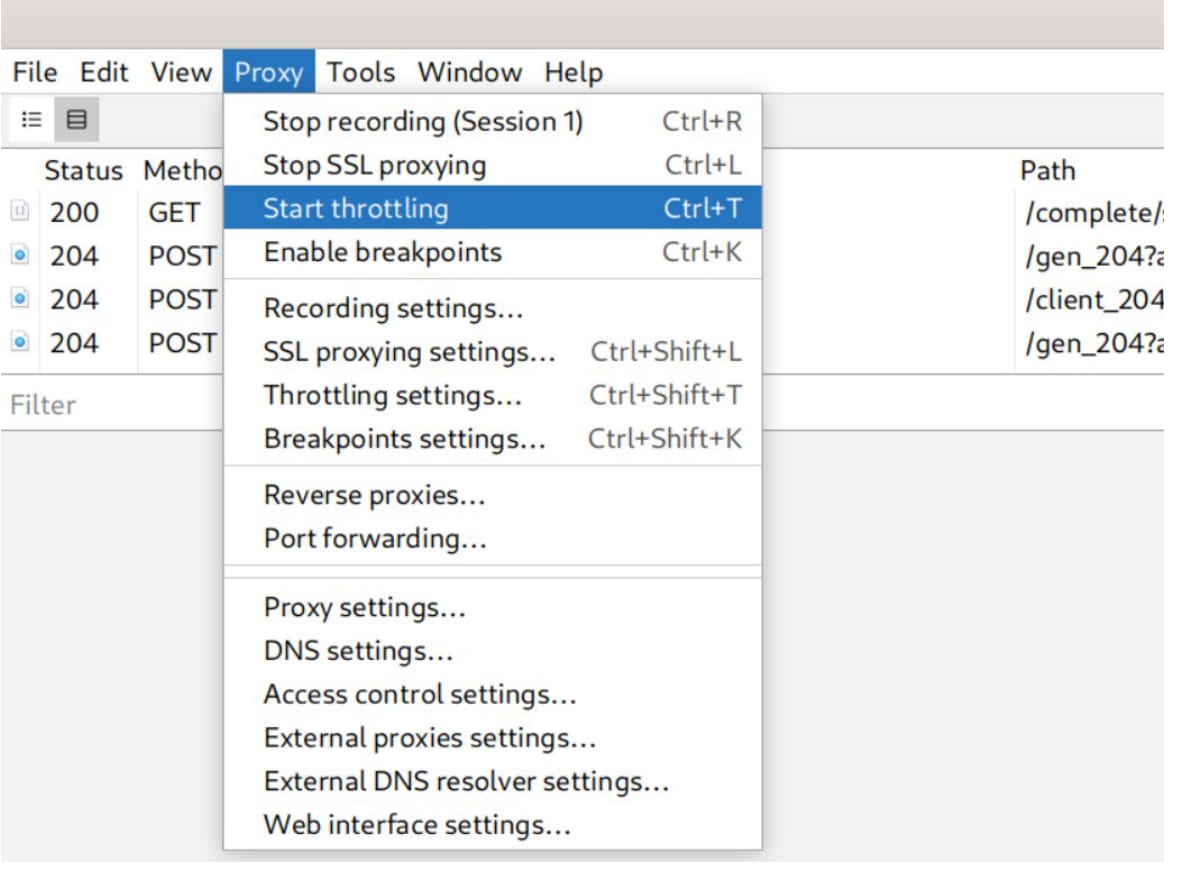
5. Throttling: testing slow network conditions
Real users do not always have fast Wi-Fi. Charles can simulate slower network conditions with throttling.
Use throttling to check:
- loading states
- retry logic
- timeout behavior
- offline banners
- duplicate requests
- broken spinners
- bad UX on slow connections
A good app should not silently hang forever. It should show a clear loading state, error state, retry option, or offline message.
6. Rewrite rules: changing traffic automatically
Breakpoints are manual. Rewrite rules are automatic.
If you need Charles to change the same request every time, use Rewrite. For example, you can modify a query parameter every time the request passes through Charles.
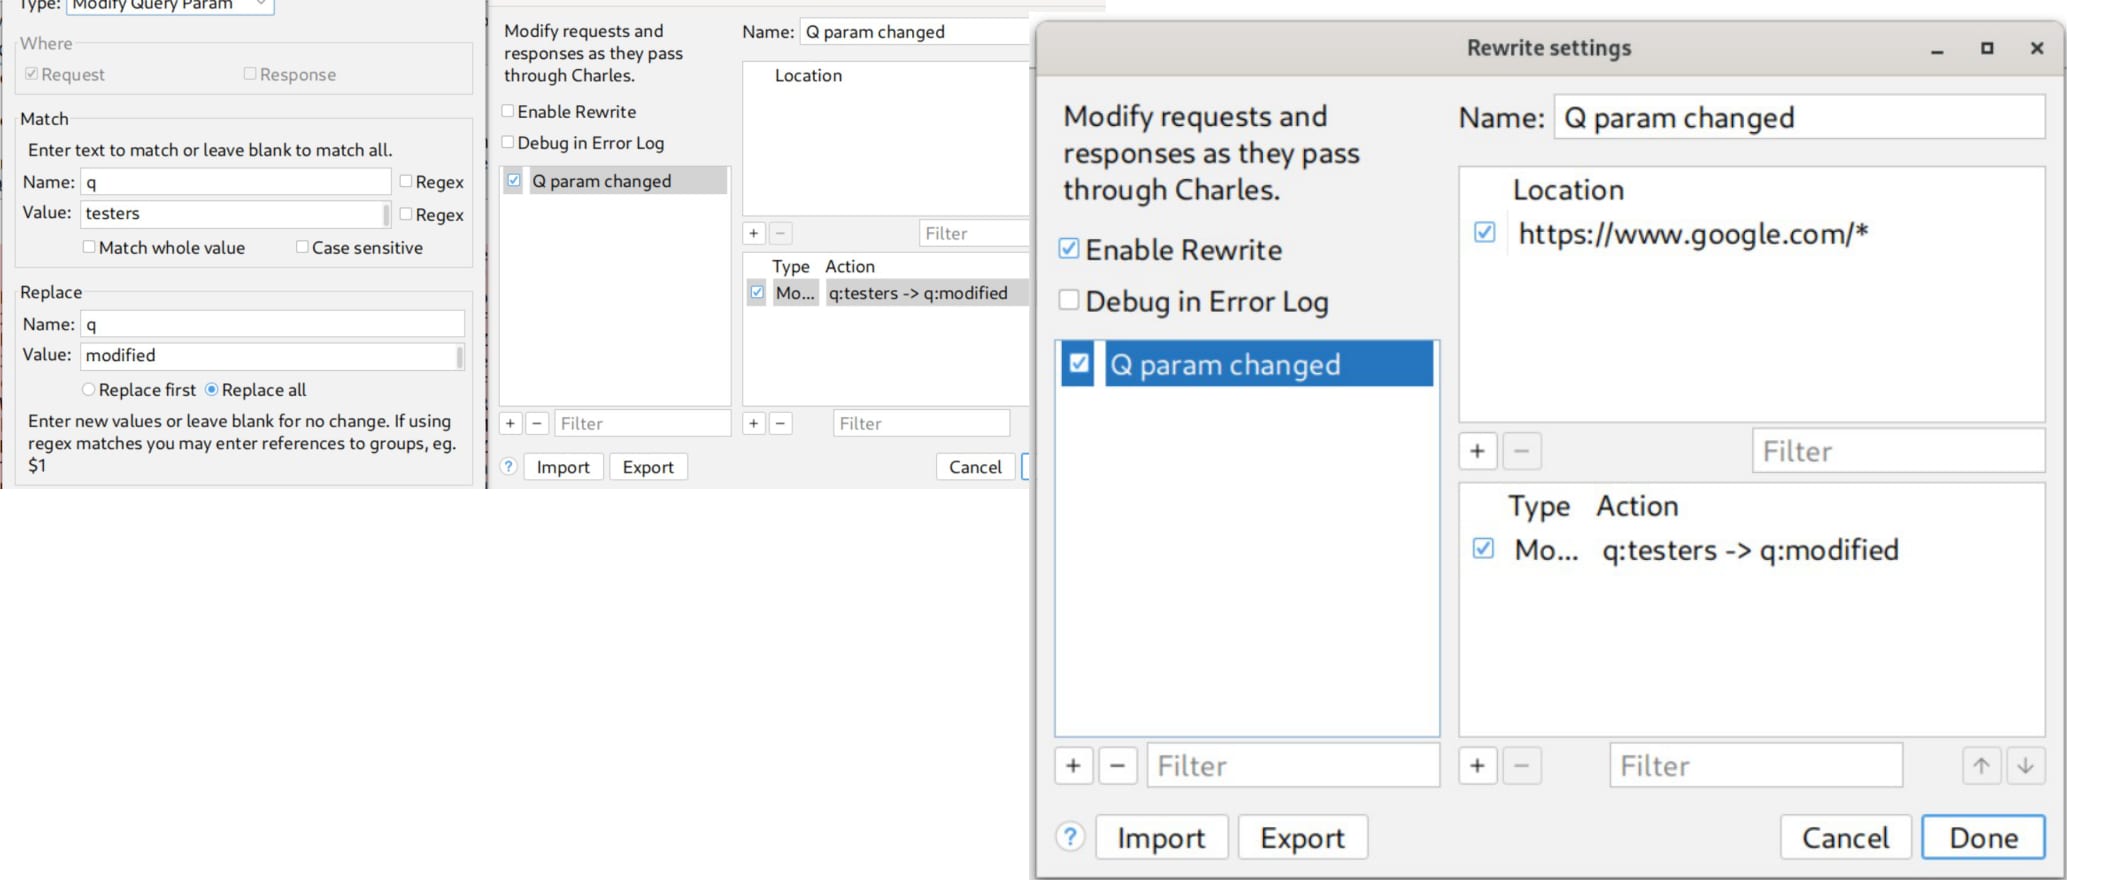
In the screenshot, the rule changes a query parameter from one value to another. This is useful when you want repeatable tests without stopping every request manually.
A rewrite rule usually needs:
- a location, such as
https://www.google.com/* - an enabled rewrite set
- a rule type, such as query parameter modification
- match value
- replacement value
This is especially useful for demos and regression testing because the behavior is repeatable.
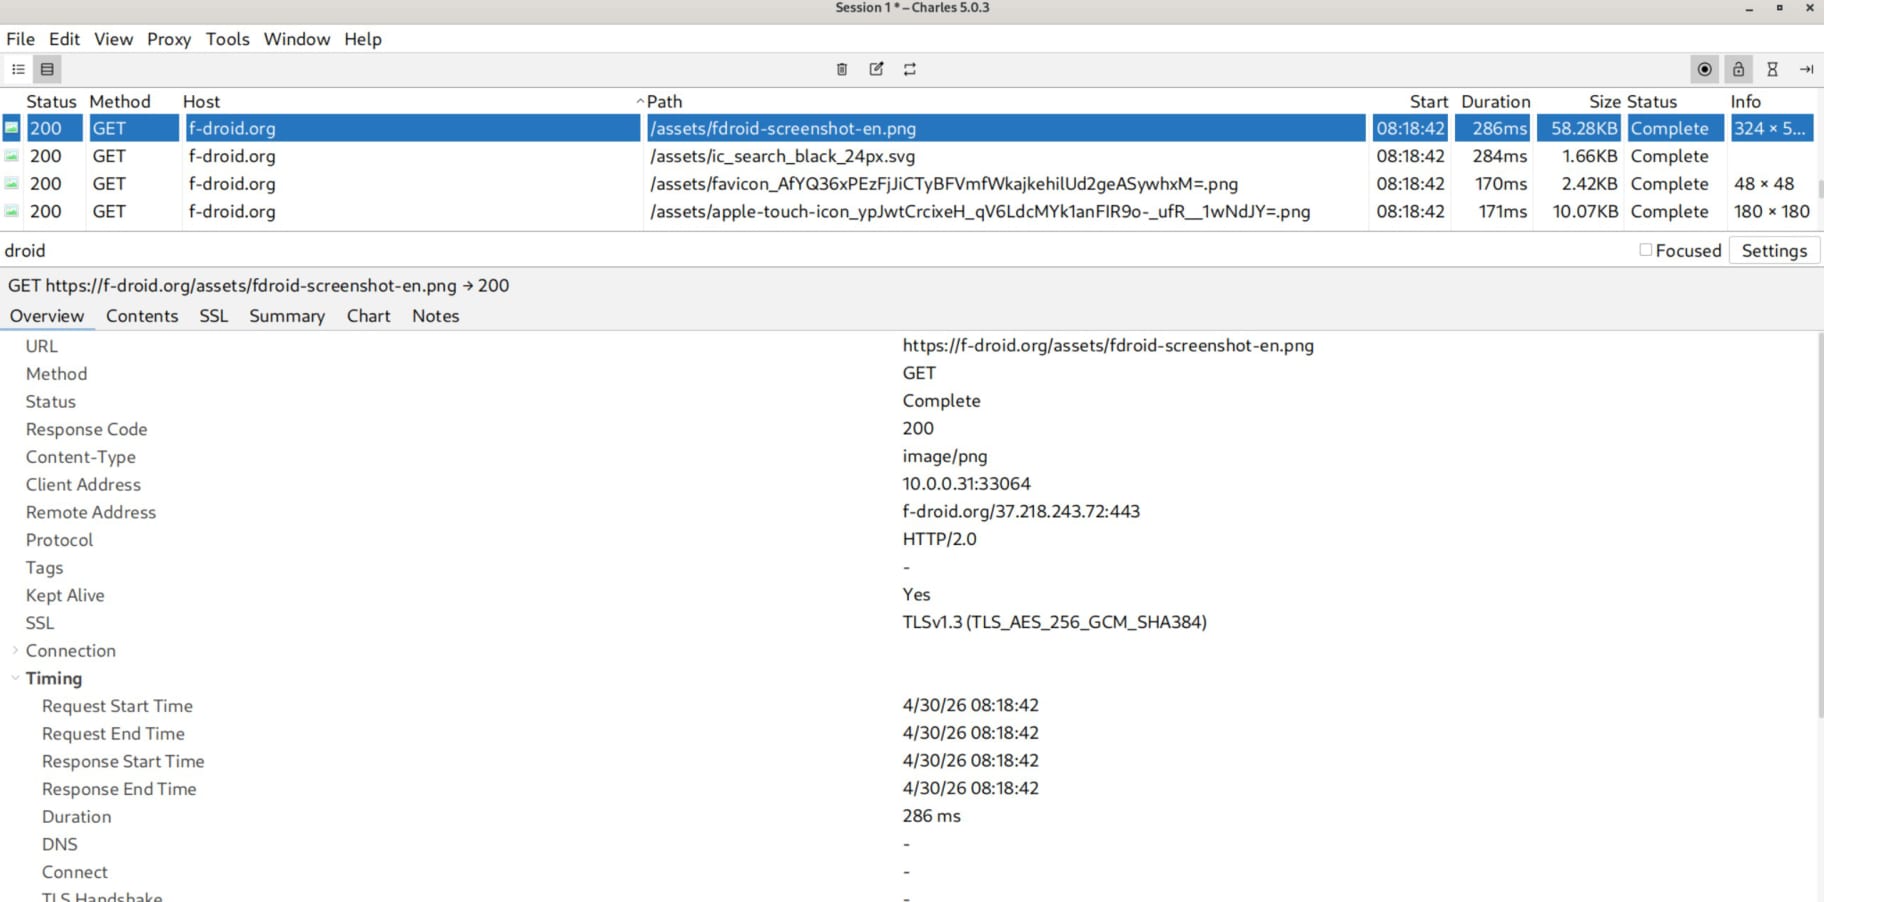
7. Filtering traffic by keyword
When many requests appear at once, use the filter field. It helps you narrow the list to a host, path, or keyword.
This is a small feature, but it saves time. In real apps, you may see analytics, images, fonts, SDK calls, ad calls, API calls, and browser traffic mixed together. Filtering helps you focus on what matters.
8. Blocking resources
Charles can block specific resources. This is useful when testing how the app behaves if an API endpoint, image, CDN, or third-party service fails.
Example cases to test:
- API endpoint returns
403. - Image resource does not load.
- Third-party SDK host is unavailable.
- Static file request fails.
- CDN is slow or blocked.
A weak app may crash, freeze, or show a blank screen. A better app will show a controlled error state.
9. Exporting and importing Charles settings
Charles settings can be exported and imported. This is useful when you want students or teammates to use the same proxy setup.
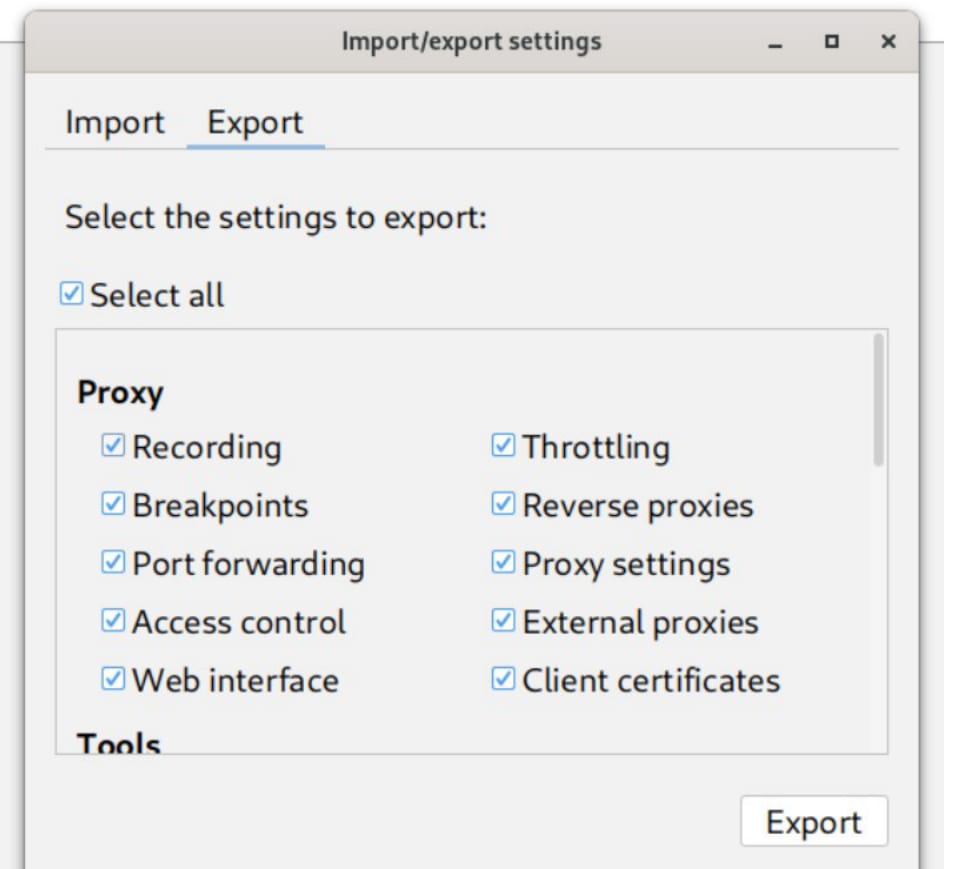
Export/import is useful for:
- sharing breakpoint rules
- sharing rewrite rules
- sharing throttling profiles
- preparing a class environment
- keeping repeatable test setups
For teaching, this is underrated. A preconfigured Charles setup avoids wasting half the lesson on UI clicks.
10. Dynamic interaction with the app using ADB
ADB allows you to interact with Android components directly. This is useful when an app has screens that are not reachable from the normal UI.
Find activities in a package
adb shell dumpsys package com.example.app | grep -i activityFor the training app:
adb shell dumpsys package com.training.vulnerablebank | grep -i activityStart a specific Activity
adb shell am start -n com.training.vulnerablebank/.DashboardActivityAnother example:
adb shell am start -n com.training.vulnerablebank/.TransferActivityStart a deep link
adb shell am start -W \
  -a android.intent.action.VIEW \
  -d "vuln://transfer"
Why this matters: some screens may be hidden from the UI but still exported or reachable through intents. This can expose sensitive flows, debug screens, or unfinished functionality.
11. Objection: runtime inspection and SSL pinning bypass in the lab
Objection is useful for dynamic analysis of an Android app. In a controlled lab, it can help you inspect app components and bypass SSL pinning for traffic analysis.
Start Objection
objection -n com.training.vulnerablebank startList Activities
android hooking list activitiesList services
android hooking list servicesList broadcast receivers
android hooking list receiversIn this lesson context, Objection is used to explore the app and make proxy testing possible when SSL pinning blocks traffic interception.
12. Static modification of an APK
Dynamic testing changes behavior while the app is running. Static modification changes the APK itself.
Decode an APK
apktool d app.apkBuild it back
apktool b app_src -o app_unsigned.apkSign the rebuilt APK
java -jar uber-apk-signer.jar --apks app_unsigned.apkJADX is also useful because it provides a readable Java/Kotlin-like view of the app code. APKTool is better when you need resources, manifest data, and smali-level patching. In practice, you often use both.
13. Useful Android paths
| Path | Meaning |
|---|---|
/data/data/ | Private app data directories. Usually requires root or app-specific access. |
/data/local/tmp | Common temporary location for pushing tools, payloads, and test files. |
/data/misc/user/0/cacerts-added/ | User-installed CA certificates. |
/system/etc/security/cacerts/ | System CA certificate store. Requires system-level modification. |
These paths matter when you are dealing with proxy certificates, test files, Frida server, app databases, or local app storage.
14. Practical checklist
Before starting the lab, verify the basics:
- Emulator starts reliably.
- ADB sees the emulator:
adb devices- Charles is running and listening on the expected port.
- The emulator proxy points to the correct host and port.
- The Charles certificate is installed correctly if HTTPS traffic is required.
- SSL proxying is enabled for the target host.
- If the app uses SSL pinning, use the lab-approved Objection/Frida workflow.
- You can see at least one request from the emulator in Charles.
Do not start debugging the app before this checklist passes. Otherwise you will waste time chasing fake problems.
Homework
Task 1: Hidden Activity and crash analysis
The VulnerableBankApp contains several screens/Activities. One Activity is not reachable through the normal UI. You need to find it and launch it manually.
Steps:
- Find the available Activities in the app. We discussed how to do this with ADB.
- Launch the hidden Activity using
adb shell am start. - After the Activity opens, find the secret code displayed on the screen.
- On the same screen there is a button that crashes the app.
- Press the button, collect logs, and identify what is wrong.
Useful command pattern:
adb shell dumpsys package com.training.vulnerablebank | grep -i activity
adb shell am start -n com.training.vulnerablebank/.ActivityNameHere
adb logcat
Task 2: Block a network request in Charles
You also need to test network blocking behavior in VulnerableBankApp.
Steps:
- Start
VulnerableBankApp. - Connect to the app with Objection.
- Disable SSL pinning in the lab environment.
- Start Charles as usual.
- In the app, use the
Network Connection Testbutton. - In Charles, open:
Tools -> Block List- Set
Blocking Actionto:
Return 403- Add the following block rule:
| Field | Value |
|---|---|
| Protocol | Leave empty / do not select anything |
| Host | httpbin.org |
| Port | * |
| Path | * |
| Query | * |
- Enable the Block List.
- Press the network request button in the app again. The request should now be blocked.